Royal Navy Intelligence forwarded the information on the Scharnhorst and Gneisenau (11" versions) to the Admiralty, which ordered two battlecruisers with speed, armour, and armament to catch and dispatch those ships. For the first time on an RN capital ship, none of the 4.5" or 5.25" gun systems were fitted to the ships. This was done as a weight saving device. To have used the bigger guns, than the 4" fitted, would have added more weight and required more space and taken the ships out to or even past the 35,000 ton limit and required more power and a larger ship, a never ending round of increases.
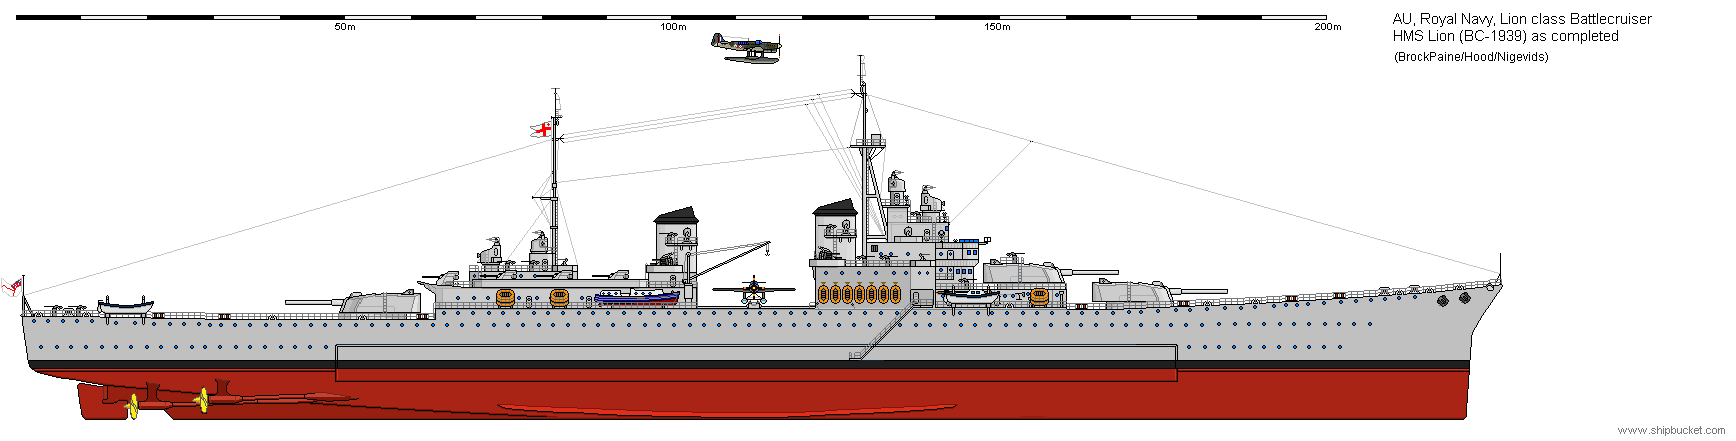
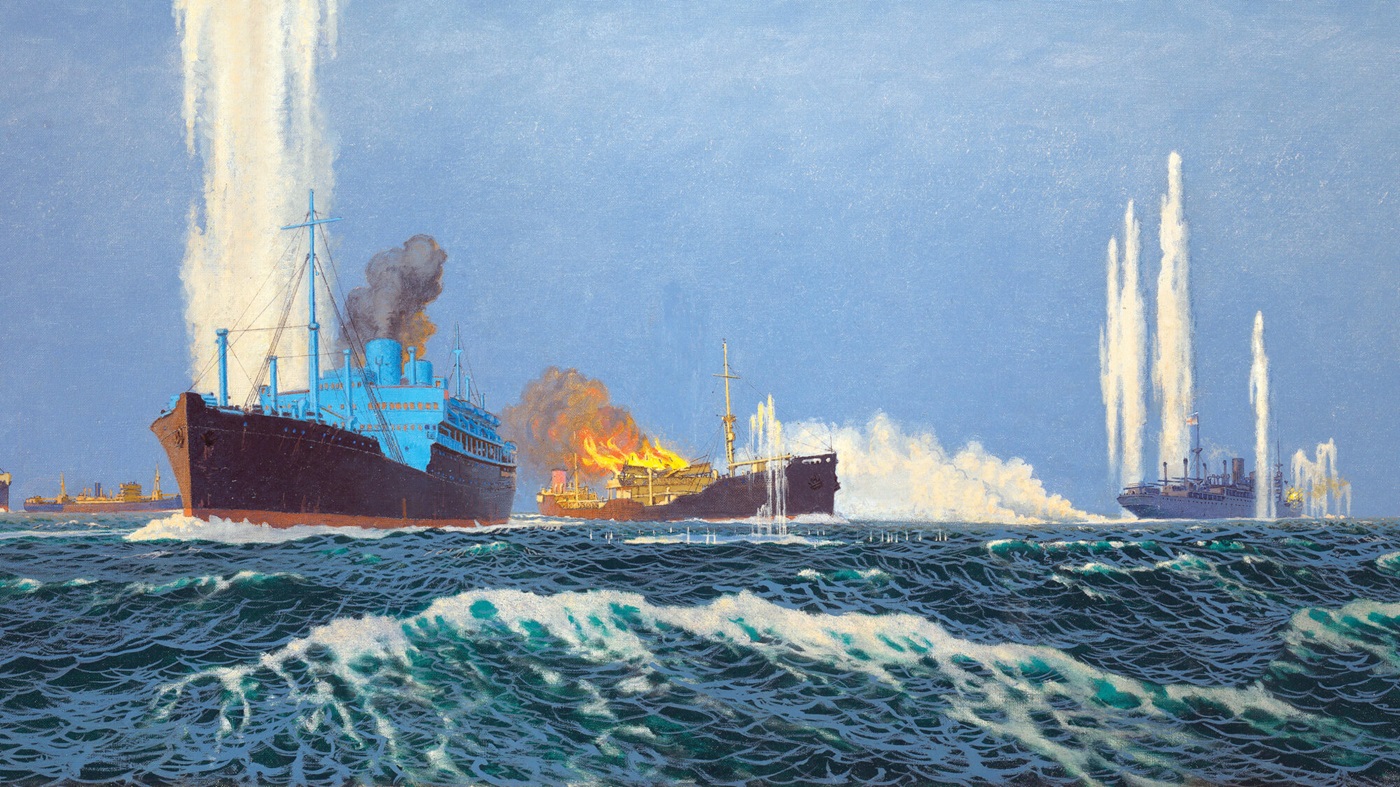
Laid down in 1936 the two ships were completed in late 1939, straight into a shooting war. Both ships were used hard being seconded to the Home Fleet and Force H by rotation. Their main task was to be on the convoy routes in the Atlantic where they would be in a position to intercept German Raiders. November 1940, with Rear Admiral Sir Henry Harwood aboard as Commander Central Atlantic forces with his flag flying on the Lion. The Lion is distant escort to the convoys to the North and South of its position. HMS Jervis Bay radios its RRR call adding the name Admiral Scheer and 'attacking'. The Lion is only 20 miles away. Orders are given for flank speed and the chase is on. Admiral Harwood is very aware of the Admiral Scheer as his last command in the South Atlantic had caused the Graf Spee to scuttle itself. Harwood receiving promotion and a knighthood for that action. Sinking the Scheer would be another feather in his cap. This was what the Lion was built for, running down enemy 11" cruisers and sinking them. 30 minutes later and the flashes are in sight, the Jervis Bay is a horrible sight with shell holes with fires gouting out of them. The Jervis Bay achieved two things, it allowed the convoy to scatter and put as many of the valuable merchant ships beyond the Scheers' reach ad allowed the Lion to catch the Scheer in the act. The Scheers' captain knew he was in trouble, probably terminal trouble, when the first 14" shells arrived around his ship. He and his officers almost got whiplash snapping their heads around to look to the south from where the shells had come from. The Scheers' Captains only hope was a lucky hit to slow the Lion down so he could escape. No such luck. The Scheer was hit first with three shells landing amidships, starting fires but more importantly slowing the Scheer down to little more than 10 knots, a sitting duck. The Scheer did hit the Lion three times causing little damage, while the regular hits from the Lion's 14" tore the Scheer apart. Both 11" turrets are put out of action and only the 5.9" are left. Another few hits and the Scheer comes to a stop and starts heeling to port, capsizing a few minutes later. Rear Admiral Harwood becomes Vice Admiral Harwood and transfers to the Mediterannean and the Eastern Fleet. The Lion goes to the Clyde to repair its battle damage and receive its 40mm refit. (A bit early but allows me to send the ship to the East on completion of the refit.) Tiger at this stage is with Force H and fighting Italians, while assisting with the Vichy French Forces question.
.PNG)
May 1941 after refit and repairs, Captain Langsford has received his orders to take the Lion to Singapore, via Cape Town and Trincomalee. Their he would receive the Flag of Commodore Agnew, who was then appointed Rear Admiral Far East in Command of the seagoing forces. The Lion and four cruisers, destroyers and other miscellaneous vessels. During July to December 1941 the Lion and two light cruisers did a tour of the Far East Forces other than Royal Navy, this included the Dutch cruiser force based at Java and the Australis Squadron based at Darwin. Periods of time was spent with both forces to come to understanding each others methods. This would pay dividends in the months to come. Arriving back at Singapore after being at Hong Kong (and removing any gold reserves to a friendlier climate), the Lion found Force Z at anchor. The two Admirals met to discuss future courses of action. Two days later the Japanese struck at Pearl Harbour and instituted its East Indies acquisition plans. Admiral Philips prepared to sortie the fleet including Lion which had to withdraw from the sortie and go into dock with condenser problems. Admiral Philips received information on a Japanese force landing troops in northern Malaya and sailed to intercept. Part of the information pack included an analysis of Japanese airpower in the Indo China area. No mention was made of the killers of the Prince of Wales and Repulse, the Naval Torpedo bomber force at Camranh Bay. Admiral Philips and the fine crews of the two ships join many more in the history books of disasters. Faulty intelligence, lack of air cover all played their part in the loss at the Battle for Malaya. Lion was spared. But none of its crew were happy about it. Feeling if their ship had been there with its extra AA firepower that the other ships may have been saved. Once all of the after action reports were in it was plain that the only thing that would have saved Force Z was half a dozen squadrons of Spitfires.
The Lion still had the Hong Kong gold aboard, to which was added the Singapore treasury and the ship left for Darwin with a destroyer escort. Offloading the bullion at Darwin for rail freight to Canberra and the Australis repository. The Lion picked up two Australis cruisers and destroyers, and went north to join the Dutch East Indies Fleet to Become the "ABDA" command. Overall command of the Squadron went to the Dutch Admiral who was the most senior officer. The ships involved at this stage were two battlecruisers, three heavy cruisers, six light cruisers and twelve destroyers. Air cover was to be provided out to the limit of the Dutch Air Force units based at Java. This proved problematic as the services did not have common frequencies. Requests to the Air Force went from the Fleet to the naval shore station who then rang the air force station who would then pass on the request to the aircraft. Many failures of communication took place.
The scene is se for an Alternate Universe Battle of the Java Sea. The outcome and carnage will not be much different as the Alternate "ABDA" still had no idea of the capabilities of the 24" Long Lance torpedoes. Only one way to find out! My adding ships to the battle really only makes the line of ships longer for the torpedoes to arrive against. So what can be done to break things up to give the ships more of a survival chance? One of the problems with the real world ABDA was that they had had no training together which aids Squadron manoeuvrability. Being able to execute regular up to 90 degree zig-zag turns will make the Japanese firing solution for their torpedo launch so much harder. Even something as simple as launching aircraft for spotting purposes would help as those aircraft should be able to spot the launch of the torpedoes.
So a vicious battle takes place almost in slow motion, the ABDA battlecruisers open fire, and under the guise of turning to parallel the ABDA line the Japanese ships fire a huge swathe of torpedoes at the ABDA line from 25,000 yards. All the cruisers are able to fire 20,000+ yards so flashes from gunfire appear rippling up and down the line with the bigger 'boom' from the large capital ships guns. Admiral Agnew is fuming, the ABDA line was supposed to have changed course several times but no command had been given by Admiral Doorman. Two minutes later Admiral Doorman was no longer a problem. His flagship the Utrecht had received five torpedo hits and literally came to a complete stop and exploded as a magazine ignited. Admiral Agnew found himself in command of a group of damaged and sinking ships as the Japanese torpedoes decimated the cruiser line. The Lion received one torpedo hit on the armoured belt which caused serious damage but the Lion was still a going concern. Admiral Agnew signalled a 90 degree turn to port away from the Japanese ships and then waited to see how many ships were capable of following the order. Six of the cruiser force did not make the turn, four were immediately terminal the other two received a couple more torpedo hits which sealed their fates. Only four cruisers made the turn with the Lion and twelve of the fourteen destroyers. Two of the destroyers had gone alongside the two possibles to see if they could be towed, but ended up picking up the crews of the sunken ships, only to be shelled and sunk by the Japanese forces as well. All of the surviving cruisers had damage from either gunfire or torpedoes. That battle had been lost, it was a matter of saving as many of the ships as possible to fight again.