The first Thorombe class ship was armed with twin 6" removed from a Karikala class armoured cruiser. I have to use a bit of 20/20 hindsight for this as the Karikala did not start its conversion till 1917. There are sixteen twin turrets that are removed from the Karikala class. They make a fine armament, three at a time for light cruisers. The first four ships of this class use twelve of those turrets, with the last four going to the follow on Vatovavy class which went from a four ship to a one ship class. The last two ships of this class used guns and turrets that had originally been intended for the King Ralambo type. Those last two ships were going to be scrapped at wars end but the need of the Fleet for patrol cruisers reprieved them.
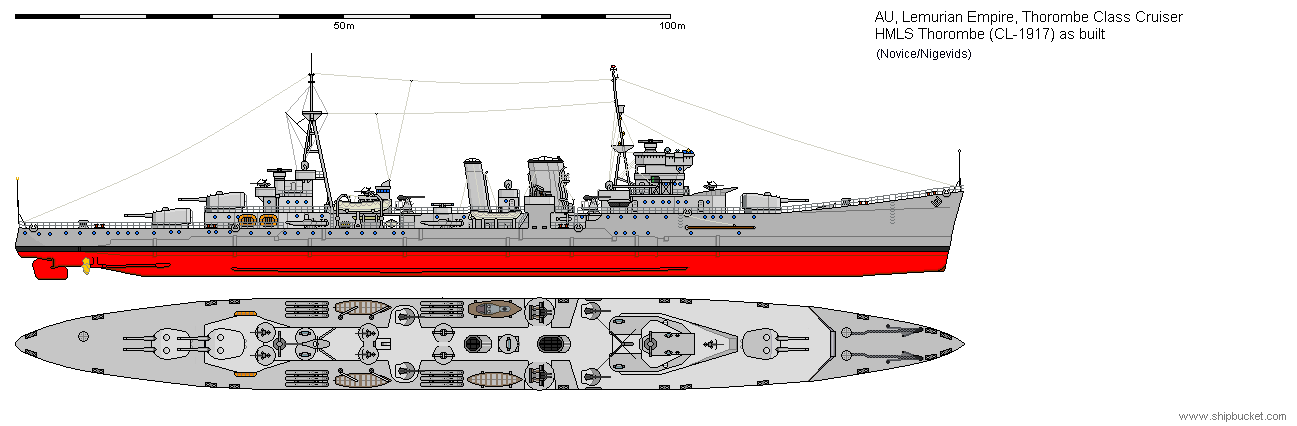
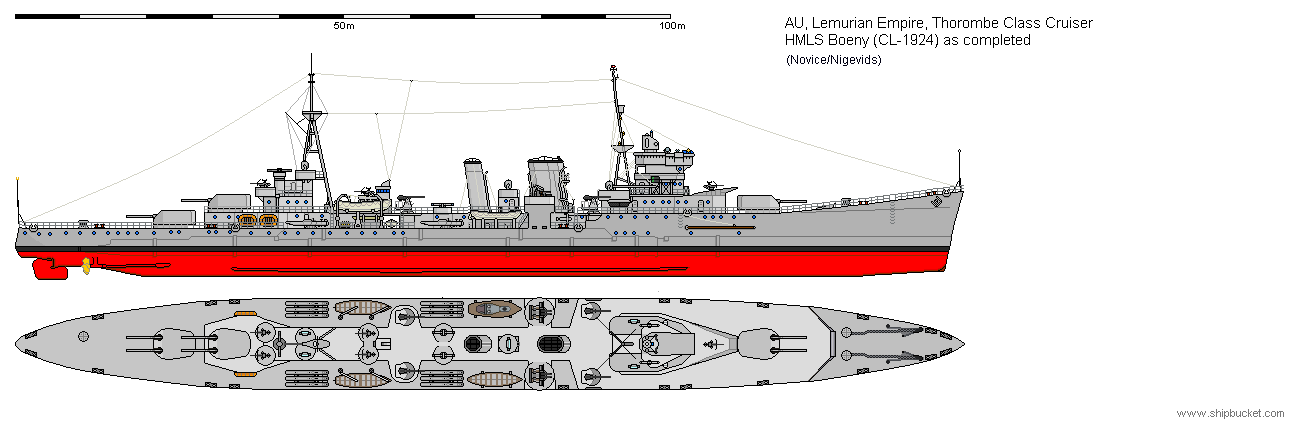
The Thorombe class were based on the Royal Navys D Class inline gun cruisers. Lemuria took the design and reconfigured it to take the three twin turrets. These ships were very necessary to the Lemurian Navy to replace the worn out ships that had been doing the patrol cruiser work around Lemuria previously. These ships were perfect for the job. The quad 2pdr AA guns took a long time to filter down to these ships. The last one finally received its last quad mounting in 1930. The building of the quad and octuple mountings went to the Capital ships first.
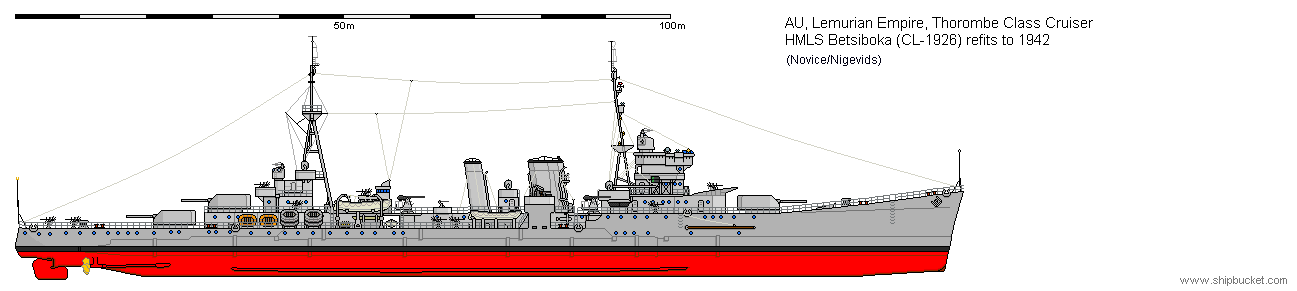
The ships remained fairly standard through the 1930's and it was not till the 20mm Oerlikon arrived that the AA armament got an upgrade. The 20mm replaced the single 2pdr mountings and added extra mountings where they could be fitted. With the addition of more and more electronics the torpedoes were removed to compensate. The torpedo directors being replaced with predictors for the 2pdr quads. The aft 6" director was replaced with a DP director for the 4".
The six ships of the class fought in all parts of the world in WW2. From the hell of the Russian Convoys to the balmy seas of the Pacific Ocean The Thorombe Class was in the thick of it.
The Thorombe had its service in the Mediterranean. It was with HMAS Sydney (and four destroyers) when that ship chased down and sunk the Bartolomeo Colleoni. Thorombe was too slow to keep up with the faster ships. It was at the retreat from Crete that the Thorombe was bombed and sunk by German aircraft while loading Commonwealth troops for withdrawal to Egypt.
Vakinankaratra was in the Western Mediterranean with Force H. Vakinankaratra witnessed the debacle at Mers El Kebir, when the Admirals in charge were too intractable to reach an agreement and the Commonwealth forces fired on the French ships in harbour. That battle triggered the Spanish intervention and Force H was lucky to escape back out into the Atlantic as Axis forces took Gibraltar and closed that end of the Med to Commonwealth forces. Vakinankaratra was transferred to Escort Command and the cruiser would be used on Atlantic Convoys as the Escort Commanders ship. To aid this the Vakinankaratra was fitted with ASDIC and depth charges. On its 3 years of service on Atlantic Convoys the Vakinankaratra shared in the sinking of two submarines. June 1944 and the Vakinankaratra is escorting a convoy which is attacked by a new breed of submarine the Type XXI U-boat. If Germany had been able to produce enough of these submarines the Battle of the Atlantic would have turned again. The Vakinankaratra was unlucky, the Type XXI fired one of the new acoustic homing torpedoes at the Vakinankaratra which struck the cruiser aft, setting off the depth charges in their racks, blowing off the ships stern. 20 minutes later the bow of the Vakinankaratra rose in the air and it slid under the sea.
Not all of the class had exciting wars, Bongolava and Sofia were a part of the 2nd Cruiser Squadron that was attached to the Main Fleet, Battleships and Aircraft Carriers needed escorting and this was the Bongolava and Sofia's job. It was the AA guns of the ships that worked the hardest. The main armament got a test shoot every now and then, but firing in anger was almost unknown. It wasn't until later in the war when the 2nd cruiser Squadron was used, with other ships, in the shore bombardment role. Both ships returned to Lemuria in late 1945 and went into reserve. They were struck from the Navy List in 1947, then sold and scrapped.
This left the two later ships, Boeny and Betsiboka. These two ships spent 1940 and 1941 chasing armed merchant cruisers around the Indian Ocean and the South Atlantic. The two ships operated as a pair because they had no aircraft to help with the search. The Boeny came across a single merchant ship and started interrogating it. The Kormoran was trying to edge round and close the range when a lookout called, "Kapitan another ship to the East". The Betsiboka was answering the Boeny's raider call. Caught between two ships the Kapitan called for full speed and tried to get closer to the Boeny. The Boeny was not fooled and its radar directed main guns started hitting with its second salvo and every salvo thereafter. The Kormoran also opened fire and fired a pair of torpedoes at extreme range. The Betsiboka was running hard to close the range and give the Boeny assistance. But it was running straight, the torpedoes the Kormoran had fired were a hopeful shot at the Betsiboka. One that paid off. The Betsiboka was just turning to open its aft guns to open fire on the Kormoran when one of the torpedoes found its mark. While the damage was serious, the ship was still able to steam and started the long journey to Perth, Australis, the nearest port with full repair facilities. The Boeny, meanwhile, was doing just fine, it had dismounted the 5.9" guns on the side firing at it. The Boeny saw an opportunity for its own torpedoes when the Kormoran tried to turn to bring its other broadsides guns into the fight. The Kormoran came out of its turn when the six torpedoes fired by the Boeny arrived. Two hits were more than enough, opening huge holes in the side of the ship and bouncing the engines off their mountings. The Boeny watched the Kormoran roll over and sink, with its flag still flying. Because of that the Boeny would not close the ship as some ardent Nazi might try to fire some weapons (torpedoes) at the ship from close range. The Boeny launched its boats, picked up the survivors then went after the Betsiboka and escorted the ship to Perth.
The Boeny goes north to join other Commonwealth forces at Darwin. They are there as a deterrent to any Japanese intentions to attack Commonwealth lands, and to support Allied countries in the region. There is not enough force there to do that, Two light carriers, a battlecruiser and six cruisers would not slow down any serious threat from the Japanese. The Betsiboka joined the Fleet on the 10th December 1941, just in time for the ships to be deployed north to go to the aid of the Dutch East Indies Squadron. The Dutch have a Carrier, Battleship, Heavy Cruiser and four light cruisers. Half a dozen American ships come south from being kicked out of the Philippines.
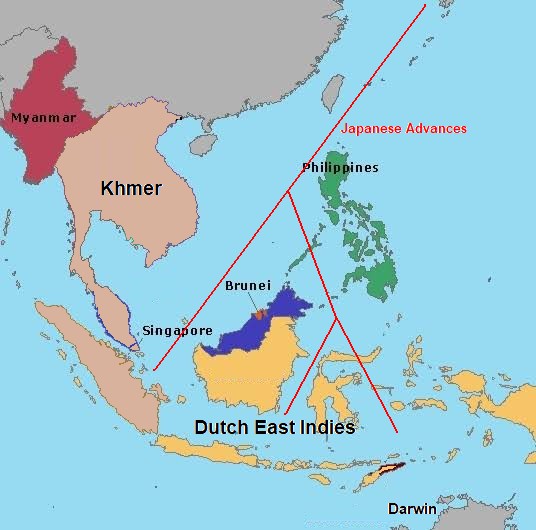
The Japanese send three forces down the various straits and channels all consisting of transports and warships. Now is the point where I have to decide whether to include Khmer or not. With Khmer, the Japanese get a complete hiding. (see CL Chakraphat for details) The Khmer were left to handle the main Japanese force heading for Sumatra and the oil fields there. The other two forces consisting of two transports each, cruisers and destroyers, passed to the east and west of Celebes Island. These were the two groups that the ABDA forces were tasked with stopping. The major advantage the ABDA forces had was the carrier assigned to each group. One was a smallish CVL the other the big Dutch CV, newly arrived on station, with its battlefleet companions. One carried 22 aircraft the other 66. But they were better than any opposition, because there wasn't any.
Eastern Group. (Com)
1 x CVL 22 air
1 x BC 9x14"
2 x CA 9x8"
2 x CL 9x6"
1 x CL 8x6" (yet to be drawn - Lemurian)
2 x CL 6x6" (Boeny type)
4 x DD 4piper
Western Group (Dutch)
1 x CV 66air
1 x BB 8x15
2 x CB 8x9.2"
2 x CL 7x6"
2 x CL 6x6"
6 x DD 4x4.7
Neither of the Japanese forces fared well. The aircraft carriers both prioritised the transports and all four were sunk by air attack. Once the transports were gone, there was no reason for the escorts to hang around, and they retreated north at best speed. Which of course was not fast enough to outrun aircraft. Another two sorties from both carriers damaged and slowed cruisers and destroyers enough to allow the surface forces to catch and dispatch them. Easy they thought. Neither of these commands had yet to encounter the Japanese 24" Long Lance torpedoes.
Leading the battleline, the battleship Celebes made a fine sight. It opened fire outside of the range of the Japanese guns, and with the aid of spotting aircraft soon started hitting the heavy cruiser that was its target. Knowing it was outside the range of conventional torpedoes it sailed serenely on, firing salvos at regular intervals. Then the dreaded call 'torpedoes!'. Too late for the line of ships to do much except alter course away and pray. Some had their prayers answered, some did not. The Celebes took two torpedo hits and while gravely damaged, it would survive. The Halland would not. Three torpedo hits and it was down by the head and the side was open to the sea. It slowly rolled over, capsized and sank. Two light cruisers Java and Sumatra were next inline, one was hit by one torpedo which detonated the forward magazine blowing the ship in two from the bridge forward, the other received two hits and ceased to exist, erupting into a ball of flame from which nothing emerged. The last three cruisers in the line escaped damage and continued to fire at the Japanese damaged ships till they were sunk. What should have been a whitewash for the Dutch ended up fairly square with each side losing three cruisers. After Action reports about the torpedo attack were circulated around the various high commands. Unfortunately not soon enough for the Eastern group.
The Eastern group had one heavy cruiser and two light cruisers to deal with as damaged ships, the destroyers were long gone. The line of battle for the Commonwealth was BC Australis, HC Berwick and Darwin, 2 x CL Leander. 3rd Lemurian Cruiser Squadron and six destroyers. The Lemurian cruisers and the destroyers were the guardships for the carrier. Previous damage to the three damaged Japanese ships saved the Commonwealth battleline. Instead of fourteen torpedoes launched in a salvo, only five tubes were still operable. Launched from 25,000 yards, two hits were achieved one on the Berwick and one on the Greymouth (Leander), neither ship was sunk, but both required a major dockyard for six months of repairs. The Australis, with its modern gunnery radar control, blew away the Japanese heavy cruiser, it was not armoured to take 14" shell damage. The Japanese light cruisers both were armed with 5.5" guns against the 8" and 6" of the Commonwealth cruisers. No contest. Both Japanese lights were sunk.
The Boeny stayed with the ABDA forces until it was transferred to Trincomalee to join other Lemurian ships, that would become the Commonwealth Eastern Fleet and the ship would again become a part of the 3rd Cruiser Squadron with its sister.
The Betsiboka went through to the Mediterranean and with the Allied forces clearing out North Africa and the landings on Sicily then mainland Italy. The Betsiboka was the first Allied major warship to transit the Med from East to West since Italy entered the war. It was on transfer to the Home Fleet for service in northern waters. There it joined the two Andriamanelo class battleships.
While the Germans still had major warships in Norwegian ports, Commonwealth battleships and carriers needed to be at sea covering the Russian Convoys. The Betsiboka alternated in the Distant cover force (Battleships and Carriers) and the close escort of cruisers and destroyers (which included Frigates, Corvettes, AA Ships, and anything else that could provide service).
The highlight for the Betsiboka was during Convoy JW51 where as part of the close escort it intercepted three Z type destroyers, which cracked on speed and would leave the Betsiboka in their dust. However a bit of smart shooting by the Betsiboka, and the last Z in the line took damage, and with a gout of steam, slowed dramatically. The Betsiboka fired several more salvos at the now stationary Z, sinking it.
The low light of its northern service was when acting with the cruiser Trinidad, again fighting Z class destroyers, both cruisers fired torpedoes at the German line. The Betsiboka's torpedoes ran true but missed their targets, but one of the torpedoes from Trinidad had a frozen gyroscope, did a full 180 degree track and the Trinidad torpedoed itself in the engine room. The ship survived and limped into Murmansk, for stop gap repairs. The Trinidad left Murmansk with a heavy escort of cruisers and destroyers. Its speed was only 20 knots. While still north of Norway the group was attacked by German bombers that hit the Trinidad again near the original damage causing the ship to slow even further. The decision was taken to scuttle the ship and all crew were taken off and the ship torpedoed by one of the escorting destroyers.
The Betsiboka joined the two battleships in returning to Lemuria in June 1945, where the battleships went on to join the Commonwealth Fleet in the South China Sea, the Betsiboka was put into reserve and its crew transferred out to a new ship then completing. The Betsiboka would have required a complete refit to make it good for further service, money, the money men were loathe to spend on a ship that might only serve for another 12 to 18 months. The Betsiboka was struck from the Navy list in 1946 and sold for scrap.